
How to Stop Your Concealer Creasing Forever with this One Simple Trick!
Up until now, in my 12 years of applying makeup on myself, I have struggled with my liquid & cream concealers creasing underneath my eyes. I have found super inconvenient ways of fixing it, like re-applying concealer half way through the day or using powder concealers (which never have as good a coverage as the liquids).
But I have FINALLY found the solution and I absolutely had to share my experience so that all the ladies out there with the same problem can finally make it through a day without worrying that their concealer has sunken into those little lines and ultimately made us look older, tired and not as neat - all the things we are trying to cover up with this product in the first place!
Have you heard of baking?! No, I don’t mean the cupcake kind. Baking is the new beauty trend currently sweeping through the YouTube world. And as soon as I heard about it’s benefits and results, I immediately had to try it.
So the basic concept of baking is that you apply your concealer as you normally would, I use Maybelline’s Fit Me Concealer in the colour 20 Sand Sable, under my eyes, around my nose and on my cheeks if needed. I also use a beauty blender to push the concealer into the skin just for that extra fix!

Then you take a translucent powder or a setting powder like Ben Nye’s neutral set powder, dip your damp beauty blender into this powder and apply it over the top of the concealer….but you don’t wipe it away or blend it in! Oh no no no no, you let it sit on top of the concealer for 10 minutes….like this…

After the 10 minutes are up take a large powder brush and gently sweep over the powder. I know it sounds like 10 minutes is a long time to add on to your beauty routine but it really isn’t…and you actually don’t need to take any longer to do your makeup at all! I apply the powder and then do my eyebrows or contouring while I wait for the powder to do its thing.
This is honestly the only effective way I have found to keep concealer from creasing under my eyes and I have been using it for the last week with different concealers and the same results every time!
And not only does it assist with concealing, the process also works as a great highlighter! I do this on the tops of my cheeks and it works a dream! Perfect highlight - errrrytime!
If you want to follow along with the video you can check out the tutorial here: Baking Makeup Technique Tutorial by Eyedolize Makeup
And if you want to try out any of the product I used in this tutorial here are the links to where you can purchase them:

Kat Von D - Shade & Light Contour Palette, buy here: http://fave.co/2a4eJsh
Maybelline - Fit Me Concealer in Sand Sable 20, buy here: http://fave.co/2a4fim4
Stila - Stay All Day Foundation, buy here: http://fave.co/2amVK8t
Ben Nye - Neutral Set Powder, buy here: http://fave.co/2a4gjdX
Beauty Blender, buy here: http://fave.co/2a4gy8M
If you try this technique out leave me a comment below letting me know your results!
xx Bridgitte

Batman Characters Costumes & Makeup Through Time
Batman is one of the most popular superhero characters of all time. And through the years, the way he is portrayed on the small and big screen has evolved. From the low budget TV series of the 1940s to the present blockbuster film, Batman has changed a lot, and so have the other characters such as Joker and Catwoman.
Batman through the Years
 |
| Lewis Wilson as Batman Source: Lacopertaazzurra |
The first time Batman was seen on the small screen was through the 1943 self-titled serial starring Lewis Wilson. The superhero had a very low budget look that was also used in the 1960s TV series that starred Adam West as Batman and Burt Ward as Robin. The aesthetics of the TV series was campy and featured kitschy catch phrases.
"Bartender, a bit of advice. Always inspect a jukebox carefully. These machines can be deadly."
 |
| Adam West as Batman & Burt Ward as Robin Source: CinemaBlend |
However, things became dark after the success of Frank Miller’s Batman: Year One and The Dark Knight Returns. Tim Burton brought Batman to the big screen in 1989 with Michael Keaton playing the brooding superhero that’s veiled in shadow. The same look was seen in the sequel Batman Returns, only darker.
 |
| Michael Keaton as Batman Source: HeroComplex |
Then the 90s brought a more cartoonish look of the caped crusader when director Joel Schumacher took over the movie franchise as director. In Batman and Robin, the costumes looked toy-like with ice-colored accents. Also looks like someone is a little cold..... #nipples
 |
| George Clooney as Batman Source: Troykane |
Batman returned to the dark side when director Christopher Nolan took the helm of the franchise with Batman Begins. The costume of the superhero felt and looked more like a heavy armor that made the caped crusader an imposing presence on the big screen. Then The Dark Knight came, which was the first time in which the superhero wore a costume that allowed him to turn his head. The latest costume worn by Ben Affleck in Batman Vs. Superman, returns to the form-fitting armor that resembles Frank Miller’s version.
 |
| Christian Bale as Batman Source: Narpyarp |
 |
| Ben Affleck as Batman Source: mosqueteirosnerd |
Evolution of Joker through Time
 |
| Cesar Romero as the Joker. Source: DailyStar |
There aren’t a lot of comic book villains that’s as consistent as Joker. He is the most iconic character in history, and his face is recognizable even if his makeup has evolved through the years. The first actor who portrayed Joker on the small screen is Cesar Romero and started the trend of Joker wearing clown makeup and red lipstick for his permanent smile.
Then in the 1980s, Joker makes a comeback in live action through the blockbuster movie Batman, where the villain was played by Jack Nicholson. He wore colorful white makeup, the trademark red lips, and bright purple suit.
 |
| Jack Nicholson as the Joker & Michael Keaton as Batman. Source: GoogleDiscovery |
However, the most memorable Joker of all time might probably be Heath Ledger. It was the most violent and darkest version of the villain to date. A of fans of the comic books said that Ledger’s portrayal was true to the character’s murderous origins.
 |
| Heath Ledger as the Joker. Source: EMGN |
Fans of Joker are looking forward on how Jared Leto will play Joker in 2016’s Suicide Squad. Based on the trailer, gone is the white makeup, and replaced with tattoos and silver teeth that make him look deranged as the previous reincarnations of the Batman villain.
 |
| Jared Leto as the Joker in Suicide Squad. Source: Apocaflixmovies |
These are how Batman and Joker evolved over time. Their costumes and makeup changed according to how the characters were played. And their looks will keep changing in the future, depending how the characters are developed by the directors and writers.
I for one will be keeping an eye out for new looks all the time and look forward to re-creating these awesome looks on my YouTube channel. Jared Leto's joker look will be coming in the next month! Make sure you're subscribed, especially if you want Halloween costume ideas and tips!
xx Bridgitte
5 of The Most Impressive Game of Thrones Makeup Creations!
Hey Eyedolizers!
Well we're all in eager anticipation for Game of Thrones Season 6 to begin! I constantly have posts about it popping up in my news feed or overhear people talking about it while sitting in cafe's. And it got me in the mood to start checking out some makeup tutorials and looks, and let me tell you there are some SERIOUSLY AWESOME looks out there! I just had to share these ones with you - Enjoy!
1. The Hound
This look was created by an incredibly talented makeup artist by the name of Claire Bryant, who has also created many other GOT looks. Check her out on Instagram!

Source: Claire Bryant
2 & 3. Daenerys & Drogon
Two amazing makeup looks created by one artist, in one video!

Source: FreshBlush
4. Lady Stoneheart
This is a screenshot from this amazing tutorial. Check out the full video on the link below to see the amazing final look.

Source: Loepsie
5. White Walker
This is definitely my favourite look! It is so stunning to look at, while this particular look wasn't done as a tutorial, but instead a high speed application, there are plenty of White Walker tutorials out there on YouTube!

Source: Elsa Rhae
xx Bridgitte
 The Most Awesome Easter Bunny Makeup Ideas for 2016
Hey Eyedolizers!!
Easter is here!!! And while many find it the best day to have the excuse of eating chocolate for breakfast (who needs an excuse!?), I find it the best day to try out some awesome bunny makeup!! This year I have compiled together some of the best bunny makeup ideas from some of the most talented makeup artists out there! Enjoy!
1. The Pretty Bunny
A great bunny look for girls who want a prettier option! This is a great one to wear to work if you work in an environment that wants you to dress up for Easter (retail stores). Bunnies don't normally have red lips, but it totally works for this look! Pair your makeup look with some black lace bunny ears - gorgeous!

Source: Bellelita Makeup
2. The Face Paint Bunny
A PERFECT look for kids on Easter! This look is extra adorable when you add the carrot finger painting to it. Add some little bunny ears or a bow headband to make your itty bitty bunny the cutest one around!

Source: Glamcheck
The Cute & Simple Bunny
An Eyedolize original tutorial. I created this one when I was running to an Easter event and threw this on very last minute. I filmed it for a tutorial and it has gone surprisingly well! I have plenty of great feedback and lots of girls send me photos of their re-creations of this look, which I LOVE to see! This is a great Easter bunny look for a last minute makeup or for a slightly pretty but still quite face-painty type of look. You can check out the full tutorial for this look on the link below.

Source: Eyedolize Makeup YouTube
4. The Full Bunny Makeup
For the lovers of extreme makeup, the ones who have hours to work on their costume, the ones who want to be the best of the best! This incredible and realistic bunny makeup is for you! This look was created by an incredibly talented makeup artist who you may have heard of before. Maria Malone-Guerbaa has transformed herself into many realistic animal makeup looks in the past so be sure to check out some of her other work if you've never seen it before!

Source: Maria Malone Instagram
I hope this has helped you out with your Easter makeup ideas!!! Happy Easter Eyedolizers!!!
xx Bridgitte

6 Ways To Wear Your Vampire Makeup Slightly Differently This Halloween
Hey Eyedolizers!!!
Halloween is just around the corner and all the costume and makeup options can get seriously overwhelming! So I will be doing posts up until Halloween to compile looks together and hopefully make your choices a bit easier.
Today's post is going to focus on another classic Halloween makeup - The Vampire!!!
Vampire costumes have been around since forever!!! And they can become a little boring, normal or standard. So here are 6 ideas on how to slightly "vamp up" (if you will), your vampire makeup for this Halloween!
1. The Sexy Vampire
This is a look that I think most females attempt to achieve at one point or another in their trick or treating life! But it can be done wrong, VERY WRONG!! So I suggest taking a page out of Linda Hallberg's book by creating a dark plum smokey eye, pair it with a red lip, throw in some vampire fangs and red contacts! And finish it off by running a teasing comb through your locks and pop on a lacy black dress - BAM! Sexy Vampire in a few easy steps. I do want to point out though that I think the addition of the red contacts for this look is pretty important - it really adds that difference to a standard vampire look.
Find this look at Linda Hallberg

2. The Drawn on Fangs
Let's be honest, those vampire fangs can get annoying!! Especially if you are attempting to eat all of your Halloween candy! So why not try this little trick from Depeche Gurl and paint them on? This way you remove the hassle of constantly having to glue your fangs back in, you can still speak normally, AND it's super simple to create this look!
Find this look at Depeche Gurl

3. The Recently Transformed Vampire
LOVE this look by the beautiful Desi Perkins. Just by adding a bite wound to the neck you create a whole new character for your vampire. And with a little bit of blood dripping down next to your mouth it's as though this lady has recently become a vampire and just tasted her first victim. Note once again the addition of contacts, these white ones are a beautiful touch and really add to the effectiveness too!
Find this look at Desi Makeup

4. Vampire Bride
This look will generally be a bit more extravagant and take some more planning and props to pull it off right, but I think the addition of a white outfit to a vampire makeup really sets it off! You can always pick up a cheap wedding dress from an op shop to create this look and add a few drops of blood around the mouth and some fangs for a simple vampire makeup to accompany your amazing ensemble!
Find this look at Iberian Black Arts

5. The Vampire Diaries Inspired Vampire
Why not stick to our generation, because let's face it, there are a million and 1 vampire shows and movies around nowadays! How about recreating this incredible Vampire Diaries inspired makeup by the beautiful Kelly Marie. She shows you how to create it in an incredibly simple to follow tutorial.
Find this look at MissKMarieXo

6. The Female Dracula Vampire
Or male!! If you are one! But I wanted to add in this awesome create by the incredibly talented Julia Graf. This is more of a traditional, scary vampire look and I love the addition of the high collar costume. Add some purples, reds and blacks to your eyeshadow and make it BOLD! Then once again, pop in some fangs...add a little extra blood dripping around your mouth than you would for some of the other looks - this vampire is fierce!!!
Find this look at Julia Graf

And so concludes my little guide to your slightly different Vampire looks for this Halloween. I hope if you were planning on going as a vampire that this has been of some assistance to you :) And make sure to follow this blog for my upcoming Halloween idea posts!
See you soon for more CREEPY ideas!
xoxo Bridgitte

This is a look that I think most females attempt to achieve at one point or another in their trick or treating life! But it can be done wrong, VERY WRONG!! So I suggest taking a page out of Linda Hallberg's book by creating a dark plum smokey eye, pair it with a red lip, throw in some vampire fangs and red contacts! And finish it off by running a teasing comb through your locks and pop on a lacy black dress - BAM! Sexy Vampire in a few easy steps. I do want to point out though that I think the addition of the red contacts for this look is pretty important - it really adds that difference to a standard vampire look.


8 Ways to Make Your Halloween Skeleton Makeup Beautiful & Feminine
1. A Basic Half-Face Skeleton with a Flower Crown
This look is incredibly easy to recreate and can be done by applying your standard base makeup, a black smokey eye that extends over your eyebrow, and some strategic placement of black lines to one side of your face. Add a crisp red lip to the other half and top it off with a large flower crown! Voila! So simple, so beautiful!
Find this look at Sunkissedandmadeup

2. A Regular Black & White Skeleton but with Coloured Hair!
Skeleton makeups are so effective and bold on their own that just the simple addition of a bit of colour can seriously make this look POP! Apply your regular black and white skull and then dye your hair a crazy colour (literally any colour will look great with it). Or if you're lucky enough to have light blonde hair throw in some hair chalk which you can wash out the next day! And there is always the option of buying a cool wig for a quick colour change option.
Find this look at SheLookBook

3. Extremely Subtle Skeleton Makeup
Something about the extreme subtleness of this look just makes it so feminine and delicate to look at. An easy look to recreate for a last minute Halloween Skull makeup!
Find this look at Sokolum

4. Bling Sugar Skull Makeup
Technically not a Halloween makeup, but actually a decoration used during Day of the Dead celebrations in Mexico. However, in recent years it has become more common for people to wear something resembling sugar skulls for Halloween. I don't believe this is meant to offend in any way but actually believe that people began wearing this type of makeup as a beautiful alternative to the normal scary skeleton look. Here is an example of a beautiful way to wear a sugar skull, simply by using one feature colour and some sequins - how stunning is this!
Find this look at Makeup Your Jangsara

5. Glow In The Dark Skeleton Makeup
Once again, this looks more like a Sugar Skull makeup, however you could simply add some glow in the dark products to a regular skeleton makeup for a seriously cool effect! Especially if you are heading out for some night-time trick or treating, or to a Halloween party! You'll definitely stand out on the dance floor with this look!
Find this look at Ashley Meagher Makeup Design

6. Half Skeleton, Half Marilyn Monroe
A beauty icon, crossed with a Halloween classic. This is definitely a genius way to make your skeleton more feminine this Halloween! This beautiful half skull, half marilyn monroe look was created by the incredibly talented Sarah Chambers.
Find this look at Sarah Chambers

7. Lower Half Face Skeleton
This lower half face skeleton still allows you to have a sexy smokey or cat eye look. And note the addition of slightly purple tinged hair! A stunning makeup for Halloween.
Find this look at Chrisspy

8. Rainbow Skeleton Makeup
And last but not least - another EyedolizeMakeup original. The addition of rainbow to any skull look is just awesome! Try out this easy rectangle skull look for a definite difference this Halloween. Alternatively you could create rainbow hair using hair chalks, or have someone else splatter rainbow face paint across your face and neck for a completely different rainbow skull effect!
Find this look at Eyedolize Makeup

I hope this has helped you on your quest to become a beautiful and feminine skeleton this Halloween!
Happy trick or treating!
xoxo Bridgitte
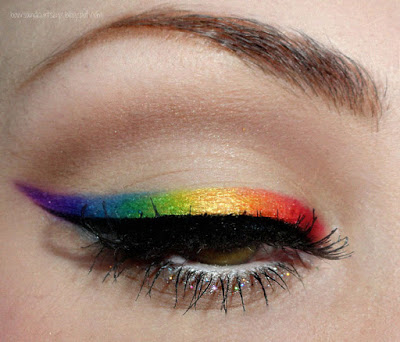
This first look is incredibly simple to create, and for such a little amount of detail it really creates a beautiful and effective rainbow look, without being OTT.
You can find this beautiful look at Bows and Curtseys
Or take it a little higher, add some glitter and create some beautiful rainbow glitter eyebrows!!
Find these glitter brows at GlitterGirlC

If you're feeling super daring then why not try out this STUNNING full face dripping rainbow makeup by the incredible talented MadeULook. She has created this look specifically for pride purposes but it could definitely be used for a kid's party or even a cool, bright Halloween makeup.
Check out more of this beautiful look at MadeYewLook

Or for those kids who don't want to sit still that long but still want an amazing rainbow makeup, why not try out this beautiful rainbow butterfly face paint!
Find this and more amazing face paint looks at Amanda's Elaborate Eyes

And bringing it back to basics a little more, this rainbow lipstick look would be great for a pride parade if you were wanting something simple and didn't have a whole lot of time to spend painting rainbows on your face!
Find this rainbow lipstick look at Euphoria

Now rainbows are already incredible bright but if you crave BRIGHTER then this is the look for you! This neon rainbow eyeshadow will definitely have you standing out!
Find this neon rainbow eyeshadow look at XSparkage

OR go the opposite way and soften the rainbow down a bit by making it a pastel style eyeshadow.
Find this beautiful pastel rainbow eyeshadow at Maryam Maquillage

This simple but really cool festival makeup is super wearable and is very eye-catching!
Check this look out, including full output inspo to go with it at Kristen Leanne Style

If you just don't really posses the artistic makeup skills then why not grab some of these rainbow lashes and create a quick and easy rainbow eyelash look!
View more of this lash look at Queen of Blending

And last but not least is an EyedolizeMakeup original creation! Why not try out these rainbow scale pattern lips for your next rainbow themed event?! I promise they are WAY easier than they look :)
Find this look (and more rainbow looks) at Eyedolize Makeup YouTube channel

As you can see there are SO many different rainbow creations out there to try! Let me know which of these looks is your favourite by leaving a comment below :)
xoxo Bridgitte
Hey there! So Halloween is coming up again - I realise it's still a few months away but it is my favourite time of year and I tend to get too excited to wait until Halloween to start deciding on costumes and playing with looks. So I started a Batman series on my YouTube channel and I will DEFINITELY be adding more looks to the series but here is what I have created so far.
Each tutorial is easy to follow so you can recreate your favourite one for Halloween!
BATMAN MASK: First up, the classic, a mask inspired by the man himself and a super easy creation of it. The great thing about this mask is that it is so gender neutral that it is fun for a girl and a boy (old school slinky reference - who got it? :P ).
Full tutorial here: Batman Makeup/Face Paint Mask

TWO FACE MAKEUP: A fantastic villain look and a really effective makeup that will definitely leave people talking about your awesome Halloween costume for a while :)
Full tutorial here: Green Two Face Makeup Tutorial

CATWOMAN MAKEUP - This tutorial shows you how to create the old-school cat woman look. I will probably also do an updated one (more like the Anne Hathaway version) soon as well.
Full tutorial here: Catwoman Makeup Tutorial

BANE MAKEUP MASK TUTORIAL - Definitely one of the more difficult ones and I would only recommend doing this one if you have at least 2 hours free to apply your makeup before you head off to your Halloween event. Also practice your Bane voice or walk around using dubsmash the whole time you're wearing this look. The Bane voice is HARD! haha
Full tutorial here: Bane Makeup Mask Tutorial

So these are my creations so far. I will be adding more to this series as I am receiving HEAPS of requests, mainly for Harley Quinn and The Joker. Leave me a comment below if you have a particular Batman character you want to see and subscribe to the Eyedolize Makeup YouTube Channel if you want updates on the new videos :)
xoxo Bridgitte
Over the last few months I've been asking my YouTube subscribers to comment their suggestions for sweet lips looks they would like me to create and this is what I've come up with so far:
DONUT LIPS - Insert Homer Simpson drool sound here! First off I decided to create a look that is inspired by one of my favourite sweet things to eat....okay that's misleading, I love eating ANYTHING sweet. But I kind of figured I could morph my lips into the shape of a donut or the "cat's bum pose" as it is so correctly referred to - and that is how I decided on my first sweet lips look being inspired by donuts!! YUM!
Check out the full tutorial for this look here: Donut Lipstick Tutorial

Full tutorial here: Mint Choc Chip Ice Cream Lipstick Tutorial

RAINBOW LOLLIPOP LIPS - Okay, anytime I upload anything to do with rainbows, my subbies go CRAZYYYY! And rightly so - rainbows are awesome! So when the requests starting rolling in for rainbow lollipop lips I knew it had to be done :)
Full tutorial here: Rainbow Lollipop Lipstick Tutorial

HOT CHOCOLATE LIPS - By the time I had got to the 4th look in this sweet lips series it was starting to get a little chilly in Australia and I was drinking A LOT of hot chocolates - needless to say, inspiration came easily that week :)
Full tutorial here: Hot Chocolate Lipstick Tutorial

CHOCOLATE SUNDAE LIPS - From one extreme to the other! While I was warming up with a hot chocolate in Australia, I think many people on the opposite side of the world would have been cooling down with a chocolate sundae! Those of you who were inspired this video :)
Full tutorial here: Chocolate Sundae Lipstick Tutorial

PEPPERMINT LIPS - A classic American style of this candy. In Australia our peppermints are plain white or green - I personally think the American ones look WAY cooler! So this lipstick look was inspired by the rad swirly pattern on American peppermint candy.
Full tutorial here: Peppermint Lipstick Tutorial

COTTON CANDY LIPS - This one was probably the highest requested look (right next to cupcake lips) and I must say it was one of my favourite to create and the finished look was so cute!
Full tutorial here: Cotton Candy Lipstick Tutorial

CUPCAKE LIPS - And the final one of the series (so far) is this pretty uber cute cupcake lipstick! I have previously created a cupcake lipstick to say thank-you to My Cupcake Addiction for doing a cupcake inspired by my leopard print makeup tutorial. But I figured it was time for an updated one, plus people were requesting it on every single one of my sweet lips tutorials :P
Full tutorial here: Cupcake Lipstick Tutorial

So there we have it! My Sweet Lips Series so far but make sure to keep an eye out as I will without a doubt be adding more to this series very soon so I will have to do a part 2 to this blog post.
I hope you enjoy all of these weirdly wonderful looks and make sure to subscribe to Eyedolize Makeup YouTube Channel for updates on all my new looks!
xoxo Bridgitte
Hi beauties!
We are just coming out of Summer here in Australia but I know that some of you will just be coming in to Summer! So I decided to create this light and pretty makeup that can be worn on a nice Summer day!
Using a little bit of aqua above the eyeliner and a nice bright pink lipstick makes for a gorgeous, fresh look!
Check out the tutorial below:
xoxo
SANTA HAT EYESHADOW!
A super cute and easy way to add just a little touch of Christmas to your makeup. Pair it with a red lip for a nice festive finish!

PRODUCTS USED:
LimeCrime - Eyeshadow Helper
MAC - Cherry Lip Liner
Sugarpill Cosmetics - Love + Eyeshadow
Gorgeous Cosmetics - Monkey Eyeshadow
Ben Nye - Iced Gold Eyeshadow
Snazaroo - Black Face Paint
Rimmel London - In The Nude Eyeliner
ModelRock - #22 False Eyelashes
Napoleon Perdis - Peep Show Black Mascara
HOLLY EYESHADOW FEATURE!
Now I'm an Aussie, and when I filmed this video I thought I was creating a Mistletoe look, I have since been informed by many of my YouTube subscribers that this in fact Holly! Haha! Either way, it is a very adorable little addition to a pretty makeup for Christmas!

PRODUCTS USED:
Lime Crime - Eyeshadow Helper
Gorgeous Cosmetics - Potato Cake, True Taupe, Fab eyeshadows
Gorgeous Cosmetics - Sand Shimmer Loose Shimmer Powder
Lime Crime - Rhyme Metallic Gold eyeliner
Face of Australia - Black Gel Budge-Proof eyeliner
Snazaroo - Green Face Paint
Lime Crime - Red Velvet Velvetines Lipstick
Ben Nye - Jade eyeshadow
Napoleon Perdis - Peep Show Black mascara
Duo - Lash Adhesive
ModelRock - False Lashes
SANTA COSTUME WITH RED & GOLD GLITTER MAKEUP!
I got this beautiful costume from Costumes.com.au and I paired it with a beautiful red glitter lipstick, and red cut crease eyeshadow! :)
For HEAPS more Christmas idea check out my YouTube channel - youtube.com/eyedolizemakeup

PRODUCTS USED:
Lime Crime - Eyeshadow Helper
Gorgeous Cosmetics - Potato Cake and Toffee Shine eyeshadows
Gorgeous Cosmetics - Sand Shimmer Gold Loose Shimmer Powder
Lime Crime - Velvetines Red Velvet Lipstick
Sugarpill Cosmetics - Love + eyeshadow
Face of Australia - Black Gel Budge-Proof Eyeshadow
Napoleon Perdis - Peep Show Black Mascara
Face of Australia - Black Pencil Eyeliner
Lime Crime - Glitter Helper
DUO - Lash Adhesive
ModelRock - False Lashes
M.A.C. Cosmetics - Cherry Lip Liner
Inglot - Rouge Lipstick
BH Cosmetics - Red Loose Glitter
Make sure to follow my blog for updates and to get notification of part 2 of these Christmas ideas!
I hope you have a wonderful & joyful Christmas! :)

You may have noticed I've amped up the amount of Halloween costume tutorials I've done lately...this is because...DUH!...Halloween is nearly here!!! I get so excited at this time of year and probably spend way more money on costume options then I should (oops!). But this creepy Coraline costume that I've created is a great one to do if you're on a budget!
So I purchased the short blue wig on eBay for around $4 from Hong Kong and it arrived quite quickly, but I would recommend ordering it at least a month before Halloween.
The only other product I used that you may not having lying around is the black face paint. You can find face paint quite cheap in a lot of craft shops, just make sure it's non toxic!
And the rest of the products I used are general makeup products that most people will have, but I have listed all of them down below.
PRODUCTS USED:
Napoleon Perdis - Peep Show Black Mascara
Face of Australia - Black Gel Eyeliner
Face of Australia - Black Pencil Liner
Shanghai Suzy - Baby Coral Lipstick
Makeup & Glow - Bouquet Lip Liner
Gorgeous Cosmetics - Skinny Dip Lip Liner
Rimmel London - Smokey Noir Black Eyeshadow
Lime Crime - Lunar Sea Liquid Eyeliner
Find me on Social Media:
Facebook: www.facebook.com/EyedolizeMakeupArtistry
Pinterest: http://www.pinterest.com/eyedolizemakeup
Instagram: @EyedolizeMakeup
Blog: http://beautygeekpug.blogspot.com.au/
Twitter: https://twitter.com/eyedolizemakeup
xoxo
Cowabunga Dudes!
I got a little bit excited about the release of the new Teenage Mutant Ninja Turtles movie which is coming out this week (here in Australia).
And it gave me a little inspiration to try out a TMNT look on my lips!
So off I set to find a green lipstick! Now I did firstly look to my trusty favourite - LimeCrime, but unfortunately the beautiful green colour they do offer was just WAY to dark for this style. Then I remembered that NYX had just released a new Macaroon lippy range and I was sure I recalled seeing a bright green...alas! I found a girl selling them on eBay for $12 and so I quickly ordered the "Key Lime" green Lipstick :)
As soon as I received it, I got straight into the studio and started filming...and this is what I came up with for my TMNT lipstick look:
 |
Check out the lipstick tutorial video below.
PRODUCTS USED:
Gorgeous Cosmetics - White iPrime
Inglot Cosmetics - #318 Eyeshadow
Inglot Cosmetics - #359 Eyeshadow
Inglot Cosmetics - #384 Eyeshadow
SugarPill - Flamepoint eyeshadow
NYX - Macaroon Lippie Key Lime
Max Factor - Glide & Define Black Liner
If any of you recreate this look, be sure to tag me on Instagram, Twitter or Facebook with pics. I'd LOVE to see them!
xoxo
After many requests over a couple of months, I decided it was definitely time to create something for you, inspired by The Fault In Our Stars (TFIOS).
I can't even tell you how many times I tried to come up with a look, having a clear idea in my head and then attempting it and failing miserably!
But I finally landed on this idea and it worked just how I'd imagined it!
Let me know what you think of this look in a comment below...Okay? Okay. ;)

PRODUCTS USED:
Gorgeous Cosmetics - White iPrime
Urban Decay - Naked2 'Tease' eyeshadow
Urban Decay - Naked2 'Blackout' eyeshadow
Inglot - #318 eyeshadow
Inglot - #315 eyeshadow
Face of Australia - Black gel eyeliner
Lime Crime - Lunar Sea Liquid eyeliner
Max Factor - Masterpiece Glide & Define black eyeliner
Maybelline - Big Eyes Black & White eyeliner
Napoleon Perdis - Peep Show Black mascara
ModelRock - False Eyelashes
Duo - Lash Glue
Don't forget to subscribe to me on YouTube so that you can get updates whenever I post a video and leave me suggestions on what you want to see!
xoxo
Hey beauties!
This week's Freaky Friday makeup was inspired by the incredible Alice in Wonderland movie. I know many of you may think it looks to cute to be a "Freaky" makeup, but have you SEEN Alice in Wonderland?!?! The Cheshire Cat is so freakin' creepy!
I can't lie, I had SO much fun creating this look...about 20 minutes in to applying it I was worried I was starting to look like a (sexy) drag queen...but it all came together with the application of that HUGE mouth! :P
If you are looking to recreate this look for Halloween I highly recommend the Snazaroo face paint for a perfectly even application and long-lasting wear.
The entire list of products I used can be viewed at the end of this post. Enjoy the video tutorial!


PRODUCTS USED:
Gorgeous Cosmetics - White iPrime
Napoleon Perdis - Light Pink Eyeshadow
Sugarpill Cosmetics - Poison Plum Eyeshadow
Rimmel London - Smokey Noir Eyeshadow Quad
Face of Australia - Black Eyeliner Pencil
Face of Australia - Black Gel Eyeliner
Maybelline - Big Eyes White Eyeliner Pencil
Napoleon Perdis - Peep Show Mascara
Ben Nye - Black & White Face Paint
Snazaroo - Bright Pink Face Paint
LimeCrime - Pink Velvet Lip Matte Lipstick
2 x Light Pink Diamantes
ModelRock - False Eyelashes
DUO - Lash Glue
If any of you do recreate this look, be sure to tag me in photos on Instagram! I love to see them :)
Instagram: @eyedolizemakeup
xoxo
Right from the moment I started the My Little Pony eyeshadow series I had one standout request from my subscribers - Pinkie Pie!!!
And so I brought you this Pinkie Pie inspired makeup. I decided to jazz it up a little by adding coloured diamantes to represent the balloons - which added a nice sparkly effect.
If any of you recreate this look, be sure to tag me on Instagram! @eyedolizemakeup


PRODUCTS USED:
Gorgeous Cosmetics - White iPrime
Gorgeous Cosmetics - White Pencil Eyeliner
MAC - Black Gel Eyeliner
Ben Nye - Magenta Eyeshadow
Covergirl - LashBlash Black Mascara
Derivan - Yellow & Fluro Blue Face Paint
Sticky Tape
ModelRock - False Eyelashes
LashGrip - Eyelash Glue
xoxo
I have had a GREAT response from you guys since posting my first video in the Adventure Time series (Princess Bubblegum) and have had many requests for me to do other character's and so this week I have brought you Finn!
I love the mix of colours in this eyeshadow and would love to try them in an evening makeup look - without the Finn head obviously! hehe
Leave me a comment below for any other looks you would like me to (try to) create!
PRODUCTS USED:
Gorgeous Cosmetics - White iPrime
SugarPill - Velocity Eyeshadow
SugarPill - AcidBerry Eyeshadow
Inglot - #480 DS Eyeshadow
Inglot - #467 DS Eyeshadow
Inglot - #318 Matte Eyeshadow
Inglot - #384 Matte Eyeshadow
Max Factor - Glide & Define Black Liquid Eyeliner
Face Of Australia - Black Pencil Eyeliner
Napoleon Perdis - Peep Show Mascara
ModelRock - #49 Lashes
Duo - Lash Glue
Sticky Tape
And don't forget to follow my blog and YouTube for more awesome makeup looks!
xoxo
Happy Friday guys! Today I've brought you a fantastically Freaky Friday video in the form of this stitched face Halloween character.
This was one of Luke's favourite looks that I've done, which I'm putting down to the fact that I couldn't talk (or whinge as he would surely say)!
Check the video out here:
PRODUCTS USED:
Ben Nye - Red & Black Face Paint
Naked 2 - Blackout Eyeshadow
Face of Australia - Black Eyeliner Pencil
Black Cotton
Duo - Lash Glue
Sewing Needle
Ben Nye - Stage Blood
Ben Nye - Nose & Scar Wax
CoverGirl - Red Lip Stain
Hope you guys are creeped out :P
xoxo
These videos are aimed at giving my subscribers great ideas for creepy, scary & freaky makeup looks to do for Halloween or for costume parties.
Along with full face makeup ideas I have also been doing a few "costume addition" techniques, such as this bullet wound look.

PRODUCTS USED:
Ben Nye - Matte Spirit Gum
Ben Nye - Dark Blood
Ben Nye - Thick Blood
MAC - Studio Fix Liquid Foundation NC20
Ben Nye Neutral Set Powder
Ben Nye - Red & Brown Face Paints
This next look is actually a lot easier than it seems and is very effective for a Halloween makeup.
PRODUCTS USED:
Ben Nye - CK-13 Old Character II Face Paint Wheel
Ben Nye - RB Red Black & White Face Paint Wheel
Gorgeous Cosmetics - Light Concealer
Gorgeous Cosmetics - Liquid Foundation 1D
Batiste - Coconut Dry Shampoo
 This last one is a pretty classic and popular Halloween costume. Although warning - it is SUPER hard to speak with those fangs in! haha!
PRODUCTS USED:
EYES ~
MAC - Studio Fix Fluid Foundation NC15
Gorgeous Cosmetics - Light Concealer
Bostik - GluStik
Gorgeous Cosmetics - DMC Black
Urban Decay - Naked2 Palette "Blackout" Eyeshadow
CoverGirl - Black Mascara
Face of Australia - Black Pencil Eyeliner
ModelRock - False Eyelashes
LashGrip - Eyelash Glue
LIPS ~
Gorgeous Cosmetics - Manhattan Lip Liner
Inglot - #176 Lipstick
The Gloss Bar - Vixen Red Lipstick
Ben Nye - Black Face Paint
Ben Nye - Stage Blood
Vampire Teeth & Orthodonics Wax can both be bought on eBay
I hope you guys find these Halloween makeup ideas useful - I have plenty more on my blog and YouTube channel so be sure to check those out too!
xoxo
That's right, I've started an Adventure Time eyeshadow series!!! I hope you guys are just as excited as me!
I've kicked off the series this week with a Princess Bubblegum inspired eyeshadow.

And note the eyeliner which resembles a certain piece of jewellery she wears ;)
Check out the video tutorial and all products used below.
Gorgeous Cosmetics - White iPrime
Gorgeous Cosmetics - Marshmellow Eyeshadow
Gorgeous Cosmetics - Pink Glimmer Eyeshadow
SugarPill Cosmetics - ButterCupcake Eyeshadow
SugarPill Cosmetics - Poison Plum Eyeshadow
Face of Australia - Black Gel Eyeliner
CoverGirl - Black LashBlast Mascara
Blue Diamante
ModelRock - #293 Flas Eyelashes
Duo - Lash Glue
I hope you guys love this look! And don't forget to share this around if you also know someone who loves Adventure Time!
xoxo
I will do a post on all of them, but for today I bring you just the one...Twilight Sparkle!!!
This was a highly requested Pony and I will admit I did film this one quite quickly as I was running a little late that week with uploading...but you guys are LOVING it!

I may have also photoshopped in a purple eye...wish this was a real eye colour!!
Check out the tutorial on how to create this below...along with all the products needed! :)
PRODUCTS USED:
Gorgeous Cosmetics - White iPrime
Lime Crime Liquid Eyeliners - Lunar Sea & Orchidaceous
Covergirl - ClumpCrusher Black Mascara
Sugarpill - Poison Plum Eyeshadow

Gorgeous Cosmetics - Marshmellow Eyeshadow
Inglot - #332 & #493 Eyeshadows
LashGrip - Eyelash Glue
ModelRock - #464 Lashes
Hope you guys love this look! And keep an eye out for the rest of the ponies coming very shortly! :D
xoxo
Hey guys!
I know it has been a little while since my last post - but my YouTube channel is still running 2 videos a week and with the new addition of my FREAK FRIDAY videos I have a few creepy makeups to show you.
There are some super effective looks here that are actually pretty easy to achieve and you don't need any sort of Special Effects makeup for majority of these looks.
I LOVE Halloween and I am super excited to do more freaky looks before then so if you do want to keep up to date or get some more ideas for a Halloween costume be sure to follow me on YouTube here: Eyedolize Makeup On YouTube
So firstly I have this incredibly easy way of doing a crying blood makeup - a great thing to add to a vampire costume!
This look is all about creating the effect of dripping blood - but with makeup that won't actually drip!
All you need in order to recreate this look is:
- red & black face paint
- a black pencil eyeliner
- a white liquid eyeliner.
Next I created this stretched lips look - a fun way to create a warped makeup look, sure to creep anyone out!

Once again, you only need a few basic products, which are:
- Light Pink Lipstick
- Pink Lip Liner
- Light Concealer
- White & Black Face Paint
- Black Eyeshadow
- White Eyeshadow

And lastly is this stapled eye look. An extremely effective way of creeping people out! This amazing 3D effect is still only created with basic products.
The products I used to do this freaky makeup were:
- Ben Nye - Dark Red, Medium Red & Black Face Paints
- Gorgeous Cosmetics - White Eyeliner Pencil
- ModelRock - Short Individual Lashes
- LashGrip - Eyelash Adhesive
- Temptu - Complexion Correct Concealer Wheel
- Vaseline - Petroleum Jelly
I hope you guys enjoy these Halloween makeup ideas! And check out my channel for LOTS more :)
xoxo
So yesterday I started the first makeup in my 'My Little Pony' series of makeup's.....and I had to begin with Rainbow Dash!!
I've done this fairly easy rainbow eyeshadow using mostly sugar pill products! Check out all the products in the YouTube description box and check out the vid below :)
Next pony will be Twilight Sparkle, stay tuned...


Gorgeous Cosmetics - White iPrime
Sugarpill Pressed Eyeshadows - Love +, Flamepoint, Glittercupcake, Velocity, Acidberry
Inglot Pressed Eyeshadow - #371
Gorgeous Cosmetics - Starlet Shimmer Powder
Gorgeous Comsetics - White Eyeliner Pencil
Face of Australia - Black Gel Eyeliner
ModelRock - Lucky Lily Lashes
Ardel - Eyelash Glue
Covergirl - ClumpCrusher Black Lashblast Mascara
xoxoxo
I created this cookie monster lipstick look after originally seeing it done by this awesome makeup artist on her blog - mrralphiesmadhouse
I re-created the look and you can check it out in the video below. Only a few products needed and you get to eat COOKIES!! :D


PRODUCTS USED:
Gorgeous Cosmetics - White iPrime
Lime Crime - No She Didn't Lipstick
Sugarpill - Velocity Eyeshadow
Rimmel - Exaggerate Liquid Eyeliner
Hope you guys enjoy this one!
xoxo
Well this one is just a little bit creepy! An eye on the lips tutorial, complete with lashes!!
This is a great look to do for halloween! And easy to switch up the eye colour to whatever you like.
 I have included a video tutorial below where you can also find the products needed to do this look.
I hope you guys enjoy it!
It got a little tickly after a while having those lashes on my lips, and you can always draw the top ones on instead if you do't want to wear the false lashes there...it's just a bit more effective with them :)
xoxo
Hey guys!I felt like head banging a bit this week and it inspired me to do a Rockstar makeup look! This one is super simple to and if, like me, you can't draw an even star to save your life - you can use a stencil to help get it perfect!!
You can mix up the star with whatever colours you like or just do it completely black for a more standard rocker look.
I'll teach the technique for the star in the video below.


Hope you guys enjoy it! xoxo
But in the lead up to the event I was inspired to do a Maleficent inspired makeup...so I incorporate the obvious colours - Dark purple, red and poison green, along with a familiar looking black shape under my eye...representative of Maleficent's head piece.

I hope you love this makeup and absolutely check out the movie if you get a chance!!
xoxox

It is not a look you see Elsa wear in the movie, but rather a makeup inspired by the colours she wears and the general colours you see through the movie (the beautiful blues and purples).

I added the snowflake with a little glimmer of glitter to really give it that magical sparkly look.
I hope you enjoy it! xoxo
PRODUCTS USED:
Gorgeous Cosmetics - White iPrime
Sugarpill - Velocity Eyeshadow
Sugarpill - Mochi Eyeshadow
Gorgeous Cosmetics - Ivory Light Eyeshadow
Gorgeous Cosmetics - Starlet Loose Shimmer Powder
Lime Crime - 6th Element Orange Eyeliner
Max Factor - 2000 Calorie Black Mascara
Face of Australia - Black Eyeliner Pencil
Face of Australia - Gel Eyeliner
YouTube: youtube.com/EyedolizeMakeup
Facebook: www.facebook.com/EyedolizeMakeupArtistry
Pinterest: http://www.pinterest.com/eyedolizemak...
Instagram: @EyedolizeMakeup
Check out the lipstick tutorial here:
I used:
~Gorgeous Cosmetics - White iPrime
~Gorgeous Cosmetics - Sand Shimmer Loose Powder
~Derivan Face & Body Paint
Hope you enjoy this colourful look!
Hi Guys!!
So I was feeling a bit uber happy today and decided to express that happiness on my eyes!!! Woooo! So below you can check out my rainbow eyeshadow tutorial :D Great for a pride parade or rainbow themed party :D
Hope you enjoy it!

But I also love it because of the awesome pastel colours you can incorporate into your makeup!

I put some videos together for how to do these awesome lips and eyes for Easter day! Check them out below
Pastel Ombre Lips:
Pastel Eyes:
Hope you all have a wonderful Easter holiday and eat a CRAZY amount of chocolate - I know I will ;)
xx
No comments:
Post a Comment